If you’re planning to host WordPress at Cloud Server with LAMP stack, this guide is going to be helpful for you. LAMP stands for Linux, Apache, MariaDB and PHP softwares which combined together known as LAMP stack.
Pros & Cons of choosing Apache web server over NGINX
- Pros: It supports .htaccess file that is commonly used by many Page Caching & Optimization. This is a great choice for non-coder.
- Cons: It is slightly less performant than NGINX but that can be managed using APO. For a high traffic site, LEMP stack is the best choice.
To Install WordPress, follow these 3 steps. Need help? Contact me. 😊
Part A: Keep Cloudflare Nameservers active
We will be using Cloudflare DNS for getting Let’s Encrypt Wildcard SSL certificate. Complete this step first to enjoy zero-downtime migration.
Check Current Nameservers
- Find your active Nameservers at https://www.whatsmydns.net/#NS/example.com
- If you see using your previous Hosting or Domain registrar default NS, then you must replace with Cloudflare.
- Learn how to use Cloudflare DNS
Part B: Get a Ubuntu Server 22.04 LTS Server ready

1. Sign up Vultr to grab $100 Free credits (Valid for 14 days)
As someone who have tried so many Cloud server company, my experience says you can’t go wrong with Vultr. These guys are genuine and caring when it comes to support and services.
⚡ Performance
- 3rd Generation AMD EPYC™
- NVME / SSD
- Up to 4 GHz CPU
- Up to 5Gbps Network Speed
- Datacenter in America, Europe, Asia, Austraillia
- IPV6 ready
💡 Features
- Beginner-Friendly Dashboard
- One-click to Snapshot
- Automtatic Backup (Paid)
- Free Cloud Firewall
- DDoS protection (Paid)
- 100% KVM Virtualization
⚙ Support
- PayPal/Card
- 24/7 Ticket Support
- Documentation
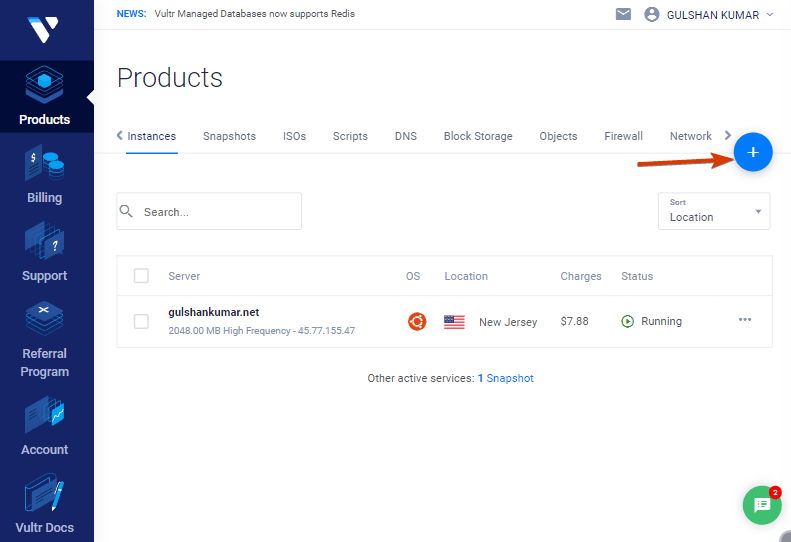
2. Deloy a New Server
Simply click on the plus button to get started
3. Choose Server type
Select Cloud Compute for shared CPU in affordable pricing.
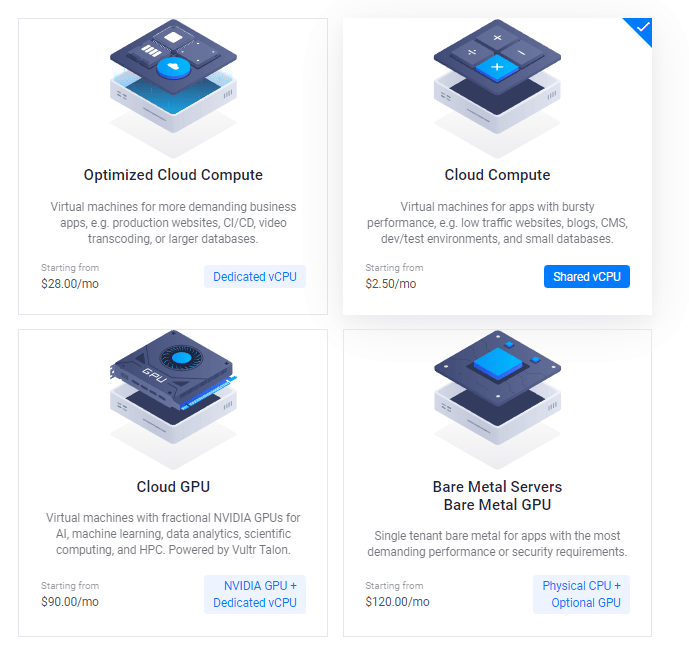
After this, you may select the AMD High Performance or Intel High Frequency option in CPU & Storage Technology. It has the fastest CPU and NVMe Disk ever. If the budget is less then go with the Regular plan with Intel CPU in which you will get SSD disk.

4. Choose a Server Location
Vultr offers server in the four continents. For the lowest latency and best performance, you should always choose a region that is closest for your audience.

For example, if 99% traffic comes from India choose the nearest region – Mumbai.
Asia
- Mumbai, India
- Delhi NCR, India
- Bengaluru, India
- Singapore, Singapore
- Tokyo, Japan
- Seoul, South Korea
America
- Miami, United States
- Atlanta, United States
- Chicago, United States
- Dallas, United States
- Honolulu, United States
- Los Angeles, United States
- Mexico City, Mexico
- New York (NJ), United States
- Seattle, United States
- Silicon Valley, United States
- Toronto, Canada, São Paulo
Europe
- Stockholm, Sweden
- London, United Kingdom
- Amsterdam, Netherlands
- Frankfurt, Germany
- Madrid, Spain
- Paris, France
- Warsaw, Poland
Australlia
- Sydney, Australlia
- Melbourne, Australia
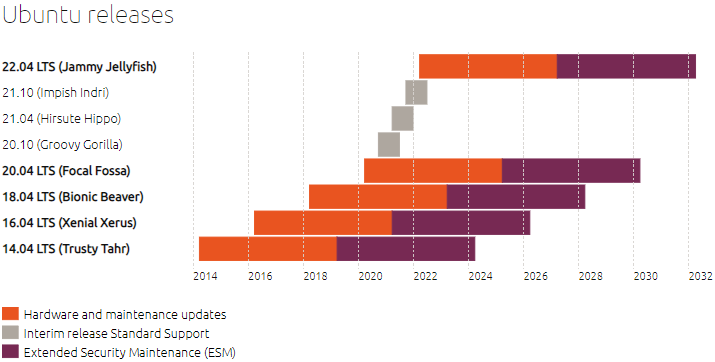
5. Select the Server Image > Operating System > Ubuntu 22.04 LTS x64
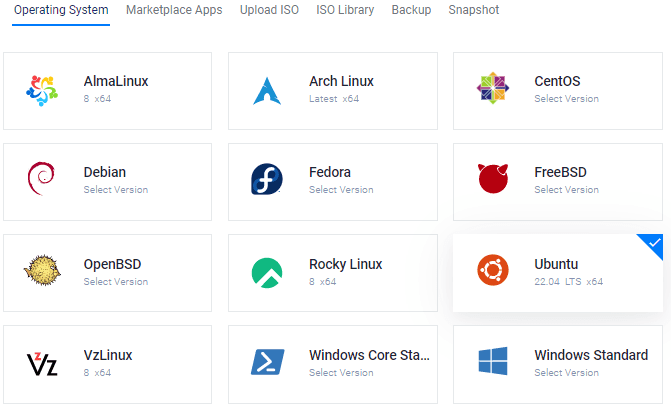
Long-term support (LTS) is a product lifecycle management policy in which a stable release of computer software is maintained for a longer period of time than the standard edition.
6. Choose a Server Size
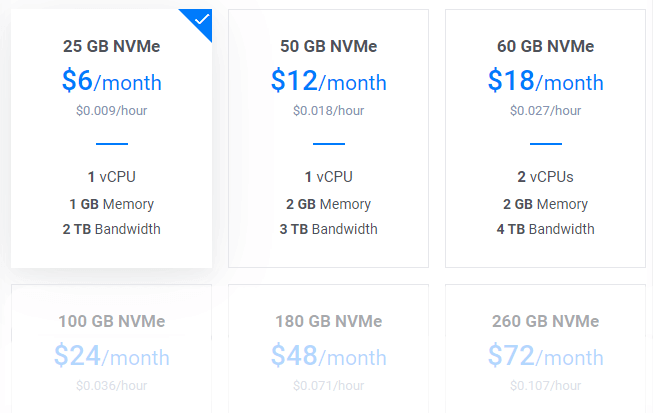
$6/mo plan would be a great starting point for a new blog. You can upgrade anytime as per requirement.
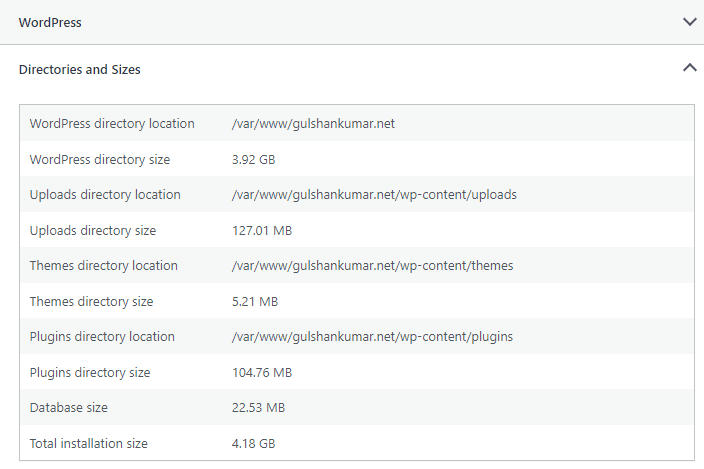
Tip: Check Total installation size in WordPress Dashboard > Tools > Site health info > Info.
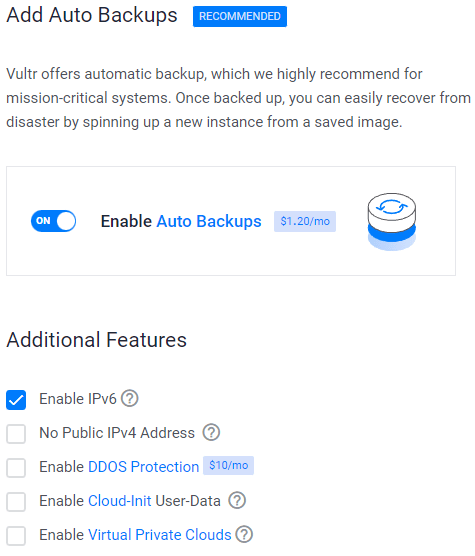
7. Enable IPV6, Backup
8. Add a SSH key
This is a recommended, optional step for the enhanced security.
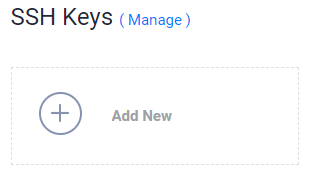
- Click on Add New button to add a new SSH key to submit your 🔒Public key.
- Generate Keys using below method as per your OS.

- Download the PuTTy application.
- Search for PuTTygen in the Start menu
- Click on Generate button and hover mouse pointer
- Copy Public key and provide to Vultr
- Enter key passphrase
- Save 🔑Private Key at the safest location.
- This can be used for login to SSH or SFTP.

- Run:
ssh-keygen -t rsa. For a more secure 4096-bit key, run:ssh-keygen -t rsa -b 4096 - Press enter when asked where you want to save the key (this will use the default location).
- Enter a passphrase for your key.
- Run
cat ~/.ssh/id_rsa.pub– this will give you the key in the proper format to paste into the control panel. - Make sure you backup the
~/.ssh/id_rsafile. This cannot be recovered if it is lost.
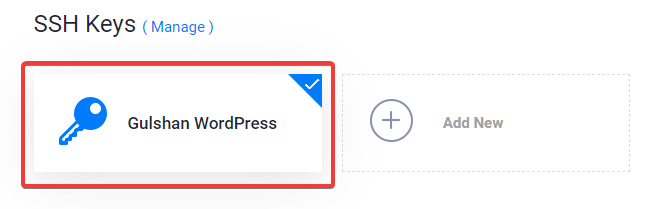
Select your SSH key
Following these steps will attach your public key to your new Instance. Then, you will be able to login to SSH using Plain Text password and SSH key both.
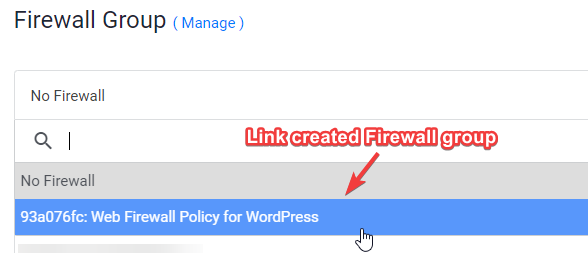
9. Link Web Firewall rule to Server Instance
It’s an optional step. You may skip this step if you don’t want now. It can be done later.
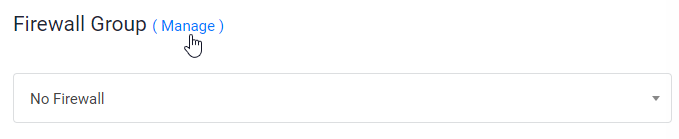
- Click on Manage and create a new Firewall Group.
- Allow TCP port 22 for SSH. 80 for HTTP and 443 HTTPS for IPV4 and IPV6 rules both.
- Once done, link the Firewall group to your Instance.
10. Enter Hostname and label click Deploy Now
Now, you will see installing in the progress
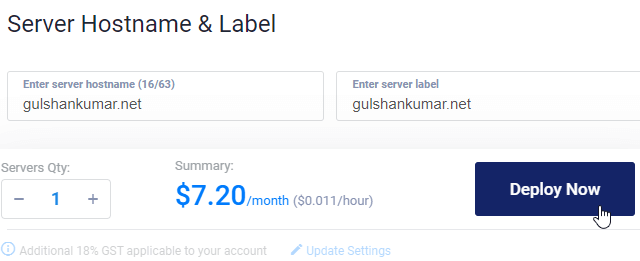
It will take up to 10 minutes.
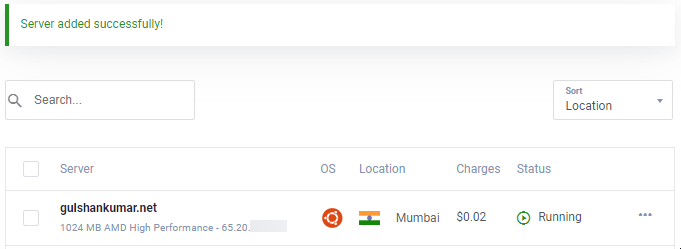
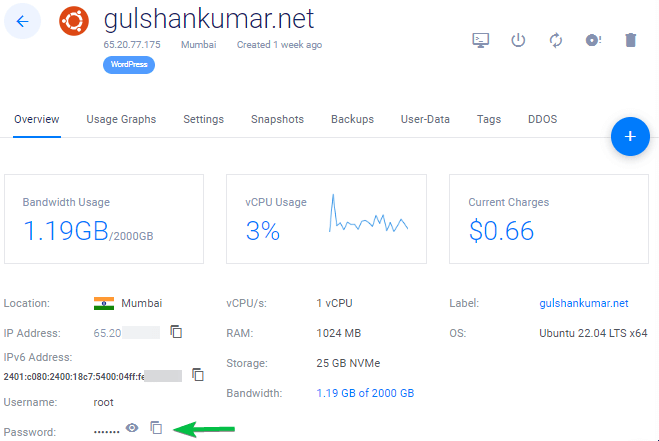
11. Go to New Instance page
Copy IP address, username and password. Your default port is 22.
12. Disable Password Login
For security reasons, it’s recommended to disable password authentication and allow only key based authentication.
- Edit the configuration file
/etc/ssh/sshd_config.d/50-cloud-init.conf - Change value for
PasswordAuthenticationfrom yes to no - To save type, CTRL + O
- Restart the SSH service using command
sudo service ssh restart
To login SSH from Linux or Mac, use Terminal with command like this
ssh [email protected] -p 22 -i id_rsa
By default, the private key file (id_rsa) is often stored in the .ssh directory within the user’s home directory.
Step 13. Disable UFW
When you deploy a new instance at VULTR it comes with UFW (Uncomplicated Firewall) enabled that keeps all ports blocked except the SSH port 22. This can return ERR_CONNECTION_REFUSED Error in the browser. To fix this, I would suggest keeping UFW disabled.
ufw disableNow, I’ll speed up the original process for deploying WordPress on the LAMP stack.
Part C. Deploy WordPress on LAMP Stack
1. Update repositories
Type below command and press enter key
sudo -sapt update && apt upgrade -y && apt dist-upgrade && apt autoclean && apt autoremove -y && rebootor
wget -qO update https://dl.gulshankumar.net/update && chmod +x updateNext time, always use below shortcut command to update.
./update2. Install MariaDB with security
Login again and enter following command
sudo apt install mariadb-server -y && sudo mysql_secure_installationAnswer below questions
- Enter current password for root (enter for none): Press the Enter key
- Switch to unix_socket authentication [Y/n]: Type n and Press the Enter key.
- Set root password? [Y/n]: Press the Enter key.
- New password: Copy a strong password from Dashlane Password Generator. To paste a password in the SSH console, right-click and press the Enter key. The password will not be visible on the screen.
- Re-enter new password: Right-click and press the Enter key again.
After successful password set, you will see
Password updated successfully!
Reloading privilege tables..
... Success!
Also, you need answer the following questions.
Remove anonymous users? [Y/n]: Press the Enter key
Disallow root login remotely? [Y/n]: Press the Enter key
Remove test database and access to it? [Y/n]: Press the Enter key
Reload privilege tables now? [Y/n]: Press the Enter key
3. Create a new Database for WordPress
Login to MySQL, press enter key when it asks for password.
mysql -u root -pCreate a new Database, and Grant Privileges to use its user with password. This is where WordPress store all post, pages, themes, plugin, etc information.
create database wordpress;
grant all on wordpress.* to gulshan@localhost identified by '5pY8CKJxDRJEGQNkX7';
flush privileges;
exit;
Where your …
database is wordpress
username is gulshan
password is 5pY8CKJxDRJEGQNkX7
Tip: Consider using unique login credential
4. Install PHP 8.2, Apache2 and set Permission
As of now PHP 8.2 is the latest stable version. In case you wish to use a different PHP version, make sure to keep same in all below commands.
sudo add-apt-repository ppa:ondrej/php -y && apt update && apt install php8.2-fpm php8.2-common php8.2-mysql php8.2-xml php8.2-xmlrpc php8.2-curl php8.2-gd php8.2-imagick php8.2-cli php8.2-dev php8.2-imap php8.2-mbstring php8.2-soap php8.2-zip php8.2-bcmath -y && sed -i 's/;cgi.fix_pathinfo=1/cgi.fix_pathinfo=0/g' /etc/php/8.2/fpm/php.ini && service php8.2-fpm restart && apt install apache2 -y && chown -R www-data:www-data /var/www/ && chmod -R 755 /var/www/Tweak PHP Configuration
Most fancy theme and plugin requires high-end PHP configuration to run. Therefore, we should make this changes.
sed -i 's/memory_limit = .*/memory_limit = 512M/g' /etc/php/8.2/fpm/php.ini
sed -i 's/post_max_size = .*/post_max_size = 128M/g' /etc/php/8.2/fpm/php.ini
sed -i 's/max_file_uploads = .*/max_file_uploads = 30/g' /etc/php/8.2/fpm/php.ini
sed -i 's/max_execution_time = .*/max_execution_time = 900/g' /etc/php/8.2/fpm/php.ini
sed -i 's/max_input_time = .*/max_input_time = 3000/g' /etc/php/8.2/fpm/php.ini
sed -i 's/upload_max_filesize = .*/upload_max_filesize = 128M/g' /etc/php/8.2/fpm/php.ini
service php8.2-fpm restart
5. Install Wildcard Let’s Encrypt SSL Certificate
Create a cloudflare.ini file inside /root/.secrets/ directory.
mkdir -p /root/.secrets/ && cd /root/.secrets/ && nano cloudflare.iniAdd below code and save using CTRL+O and exit using CTRL+X
dns_cloudflare_email = "[email protected]"
dns_cloudflare_api_key = "XXXXXXXXXXXXXXXXX"
Find your Cloudflare e-mail and Global API key at “My Profile” > API Tokens > Global API Key
chmod 0400 /root/.secrets/cloudflare.iniInstall Certbot and DNS Authenticator according to OS and HTTP web server
apt install snapd -y
snap install --beta --classic certbot
snap set certbot trust-plugin-with-root=ok
snap install --beta certbot-dns-cloudflare
snap connect certbot:plugin certbot-dns-cloudflare
Get Wildcard SSL Certificate
certbot certonly --dns-cloudflare --dns-cloudflare-credentials /root/.secrets/cloudflare.ini -d example.com,*.example.com --preferred-challenges dns-01 --dns-cloudflare-propagation-seconds 30Set Automatic Renewal using Cron Job
- Type
crontab -e - Type 1 for nano editor
- Enter below command and save
0 0 * * * /etc/init.d/apache2 reload >/dev/null 2>&1Test renewal
certbot renew --dry-runActivate these useful modules
a2enmod proxy_fcgi ssl http2 expires headers rewrite remoteip
systemctl restart apache2
6. Create App Directory for each WordPress site you want to install
mkdir -p /var/www/example.com/publicThis will be your Document Root path in your Apache Configuration file. The reason of creating example.com inside www is to keep each site organized way. Second, I created public directory as well with aim to keep all WordPress core files there but wp-config.php one level up (/var/www/example.com/).
7. Create Apache2 Configuration
This is important where you need configure your domain, how Apache2 should handle your HTTP requests.
Delete default server blocks configuration files of Apache2
rm /etc/apache2/sites-available/000-default.conf
rm /etc/apache2/sites-available/default-ssl.conf
rm /etc/apache2/sites-enabled/000-default.conf
source /etc/apache2/envvars
Now, Create a new server block configuration files. You need to do this step everytime you want to add a new WordPress at same server.
Please replace example.com with own domain and do not forget to end the configuration file name with .conf extension. Otherwise it won’t work.
cd /etc/apache2/sites-available/
nano example.com.conf- Replace
example.comwith own domain - Enter below code and Press ctrl+o to save and ctrl+x to exit.
##############################################################
#
# NOTES: Kindly make search and replace of example.com to own domain.
#
##############################################################


# We are going to Force HTTPS non-www
# If you want HTTPS www please keep https://www.example.com/ in the last line.
# Or you may face redirect loop issue.

<VirtualHost *:80>
   ServerSignature Off
   ServerName example.com
   ServerAlias www.example.com
   Redirect permanent / https://example.com/
</VirtualHost>

<VirtualHost *:443>
   ServerSignature Off
   ServerName example.com
   ServerAlias www.example.com
   Protocols h2 h2c http/1.1
   DirectoryIndex index.php index.html

   # Recommended for Cloudflare users
   # RemoteIPHeader X-Forwarded-For

   # Document Root Path (Pay attention to this path to avoid 404)
   DocumentRoot /var/www/example.com/public

   # Logs Path is /var/log/apache2/example.com-access.log
   ErrorLog ${APACHE_LOG_DIR}/example.com-error.log
   CustomLog ${APACHE_LOG_DIR}/example.com-access.log combined

   # Let's Encrypt SSL
   SSLEngine On
   SSLCertificateFile /etc/letsencrypt/live/example.com/fullchain.pem
   SSLCertificateKeyFile /etc/letsencrypt/live/example.com/privkey.pem

   # Allow use of .htaccess file to override configuration
   <Directory /var/www/example.com/public>
     Options FollowSymLinks
     AllowOverride All
     Require all granted
   </Directory>

   # Block PHP execution inside Uploads Directory
   <Directory /var/www/example.com/public/wp-content/uploads>
    <Files *.php>
      deny from all
    </Files>
   </Directory>

   # Protect wp-config.php
   <files wp-config.php>
      order allow,deny
      deny from all
   </files>

  # HTTP Auth for additional security
  # If you want HTTP Auth for WordPress Login page then consider uncommenting this block of code.
  # If you do so you must generate .htpasswd file as well.
  # <Files wp-login.php>
  #  AuthName "Admins Only"
  #    AuthUserFile /var/www/.htpasswd
  #   AuthType basic
  #    require user gulshan
  #   <RequireAny>
  #      Require ip 127.0.0.1
  #       Require valid-user
  #   </RequireAny>
  # </Files>

   # Block XML-RPC to prevent DDoS Attack.
   <Files xmlrpc.php>
      Order Deny,Allow
      Deny from all
   </Files>

   # Handle PHP execution
   <FilesMatch ".php$">
      SetHandler "proxy:unix:/var/run/php/php8.2-fpm.sock|fcgi://localhost/"
   </FilesMatch>
</VirtualHost>
To save, press CTRL+O and Enter key. Then, exit nano editor using command CTRL+X.
To activate server block, enter the command
Before running below command, please replace example.com to own domain.
a2ensite example.com.confTest configuration (optional)
apache2 -tRestart and update
service apache2 restart && service php8.2-fpm restart && service mysql restart && apt-get update && apt upgrade -y8. Install WordPress files
Download WordPress files in /var/www/example.com/public/ directory and set permission.
cd /var/www/example.com/public/ && wget https://wordpress.org/latest.tar.gz && tar -xvzf latest.tar.gz && mv -v wordpress/* /var/www/example.com/public/ && rm -rf latest.tar.gz wordpress && chown -R www-data:www-data /var/www/example.com/public/ && sudo chmod -R 755 /var/www/example.com/public/To update permission in future, use below command. This will set www-data for everything inside /var/www/ directory
chown -R www-data:www-data /var/www/example.com/public/ && sudo chmod -R 755 /var/www/example.com/public/9. Updating DNS
If you’re hosting WordPress locally, want to bypass proxy or want to perform zero downtime migration, this step is useful. I generally prefer in case of Static WordPress Dev area. 😉
- There are two ways to point DNS. If you are migrating site to Vultr and want to test first locally then edit your hosts file and point there.
For Windows
- Go to properties of C:\Windows\System32\drivers\etc\hosts
- Change “Security” permission to full control for your current Username
- Now you can freely edit the hosts file under your System user and save it.
# For same machine you can have localhost address else public IP
127.0.0.1 example.com
127.0.0.1 www.example.com
An example, this is how it should look
For Mac or Linux
You can edit hosts file using this command under sudo user.
sudo nano /etc/hostsUpdating DNS with Cloudflare
- If everything looks perfect and you want to make your site live, Login to Cloudflare DNS and update new IP.
| A | @ | IPV4 |
| AAAA | @ | IPV6 |
| CNAME | www | example.com |
where @ denotes root domain example.com
9. Visit your domain name to setup WordPress
If you want to keep non-www version domain for your WordPress then visit non-www version else www.
https://example.com- Provide Database login credential to begin WordPress Setup
- Run Installation
- Fill up Basic details of your new Site and Install WordPress.
- Login to WordPress
Other neccessary things
- Increase the Swap Memory to deal with sudden load
swapoff -a
fallocate -l 2G /swapfile
chmod 600 /swapfile
mkswap /swapfile
swapon /swapfile
sudo cp /etc/fstab /etc/fstab.bak
echo '/swapfile none swap sw 0 0' | sudo tee -a /etc/fstab- Make sure to use a Page Caching plugin to keep server load in control. As this is a LAMP stack, I would recommend you WP Fastest Cache.
- Always keep backup.
- Use SMTP plugin Services for sending outgoing email of WordPress otherwise you will not be able to receive password reset link, contact form 7 messages.
Finally, the WordPress installation has been completed.
What is the LAMP Stack?
LAMP stands for Linux, Apache, MySQL, and PHP. It is a web development platform that consists of open-source software used to create and run dynamic websites and web applications.
What are the necessary prerequisites for installing WordPress?
The essential requirements for the successful installation of WordPress include a registered domain name, the utilization of Cloudflare DNS services, and a cloud-based server configured with the Ubuntu operating system.
I greatly appreciate your valuable time in reading this article. See you in the next tutorial!
I love what you did here. its 80% of what I been searching for. Im trying to selfhost a LAMP stack on my home server using cloudflare tunnels to run a wp website. Its a taunting task because my service provider will not let me punch as hole in my router. Thats why im using cloudflare tunnels.
Is it possible you could create a guide using cloudflare tunnels and self hosting on a home server?